Install A Kubernetes Cluster | How to setup a basic Kubernetes Cluster using KubeADM
Kubernetes is the backbone of modern container orchestration, powering everything from small projects to enterprise-scale applications.
Whether you're a beginner or a seasoned engineer, understanding how to set up a Kubernetes cluster is a fundamental skill. In this tutorial, we'll take a hands-on approach using Kubeadm, one of the most popular tools for bootstrapping a Kubernetes cluster.
⚠️ WARNING: Single Control Plane = Single Point of Failure! 🚨 A cluster with only one control plane is not highly available. If the control plane node goes offline, the entire cluster becomes unmanageable—no scheduling, no updates, no kubectl commands. This setup is fine for learning and testing but not recommended for production.
In our next tutorial, we will add more control planes to achieve high availability and a production-ready cluster.
This tutorial is an extension of Drew's Playlist. Check it out for more background on Kubernetes setup and best practices.
Introduction
Kubernetes is a platform that helps you run and manage containers (like Docker) at scale across multiple machines. It handles scheduling, networking, scaling, and fault tolerance for applications.
Kubeadm is a powerful tool that simplifies Kubernetes cluster setup. It provides best-practice defaults while ensuring a secure and production-ready environment. In this guide, we will walk through setting up a Kubernetes cluster using Kubeadm, discuss networking options, security considerations, common pitfalls, and next steps for deploying workloads.
There are multiple ways to set up a Kubernetes cluster. While Minikube and kind are great for local development and testing, Kubeadm is a more stable and production-ready option for setting up real multi-node clusters. If you're looking for alternative approaches, you can check out tutorials on Minikube and kind
SCENE 1: Pre-requisites
- Note: With VirtualBox's help for these tutorials, there's no need to install them on physical servers. In terms of just setting things up, unless you're using managed servers, this should get you going!
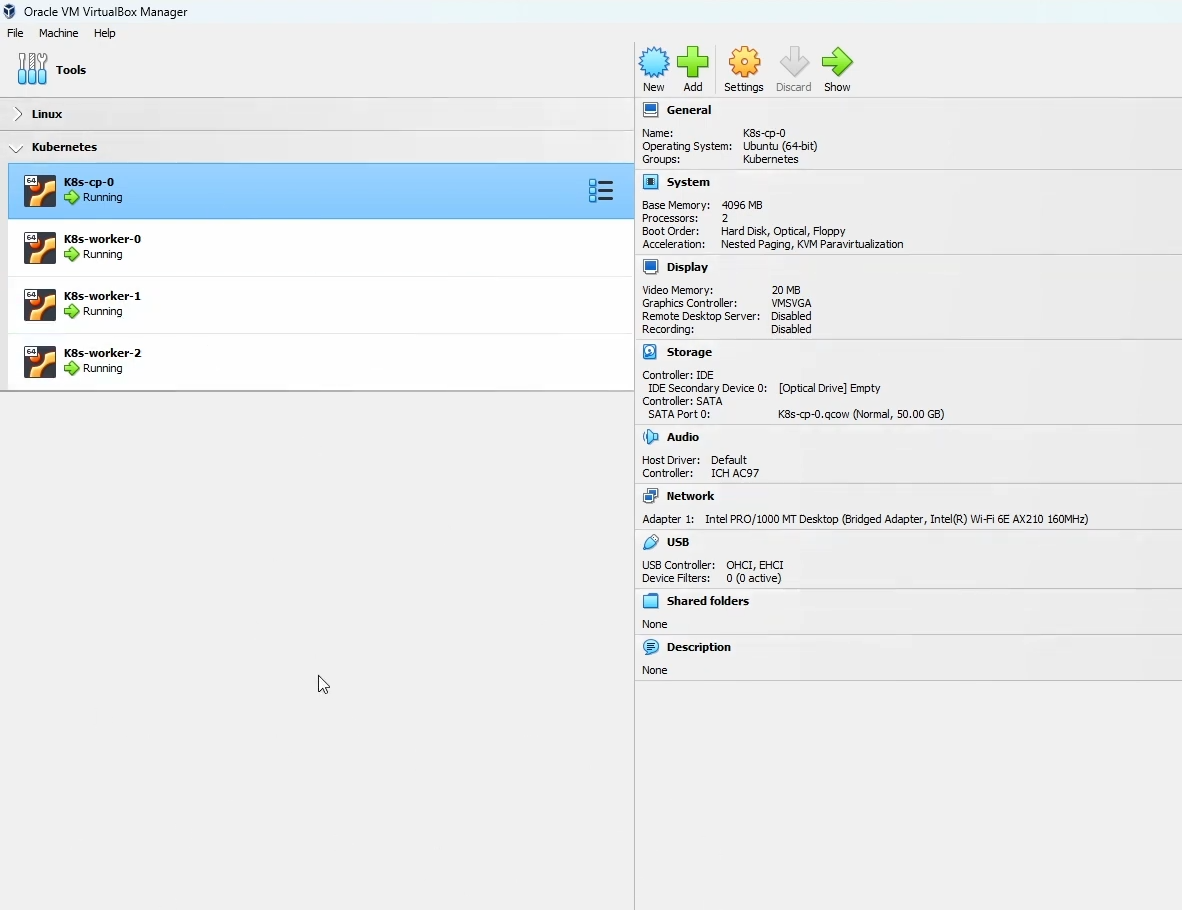
1.Setting up the VM
We're going to start with one control plane node and three worker nodes, all set up using this Ubuntu tutorial. The only difference between this setup and the tutorial is that we are not using RAID and do not have a swap partition. Instead, each VM consists of just a root partition and a boot partition.
🔴 Ubuntu Version: This guide uses Ubuntu 22.04 LTS, ensuring compatibility with the latest Kubernetes versions. Using different versions may lead to unexpected issues.
🔴 Recommended VM Resources: For a smooth Kubernetes setup, each node should have at least: – 2 CPUs – 2 GB RAM (4 GB recommended for better performance) – 10 GB of disk space
Before proceeding, check the official Kubernetes Docs for the latest prerequisites.
2. Time to Play with the Terminal 🖥️
We’re working with four nodes in this setup (Since the author of this blog has ADHD, multitasking is a must!) To manage all four nodes efficiently, we’ll use TMUX to synchronize our terminals, allowing us to run the same commands across multiple machines simultaneously.
After following this tutorial, your terminal should look something like this:
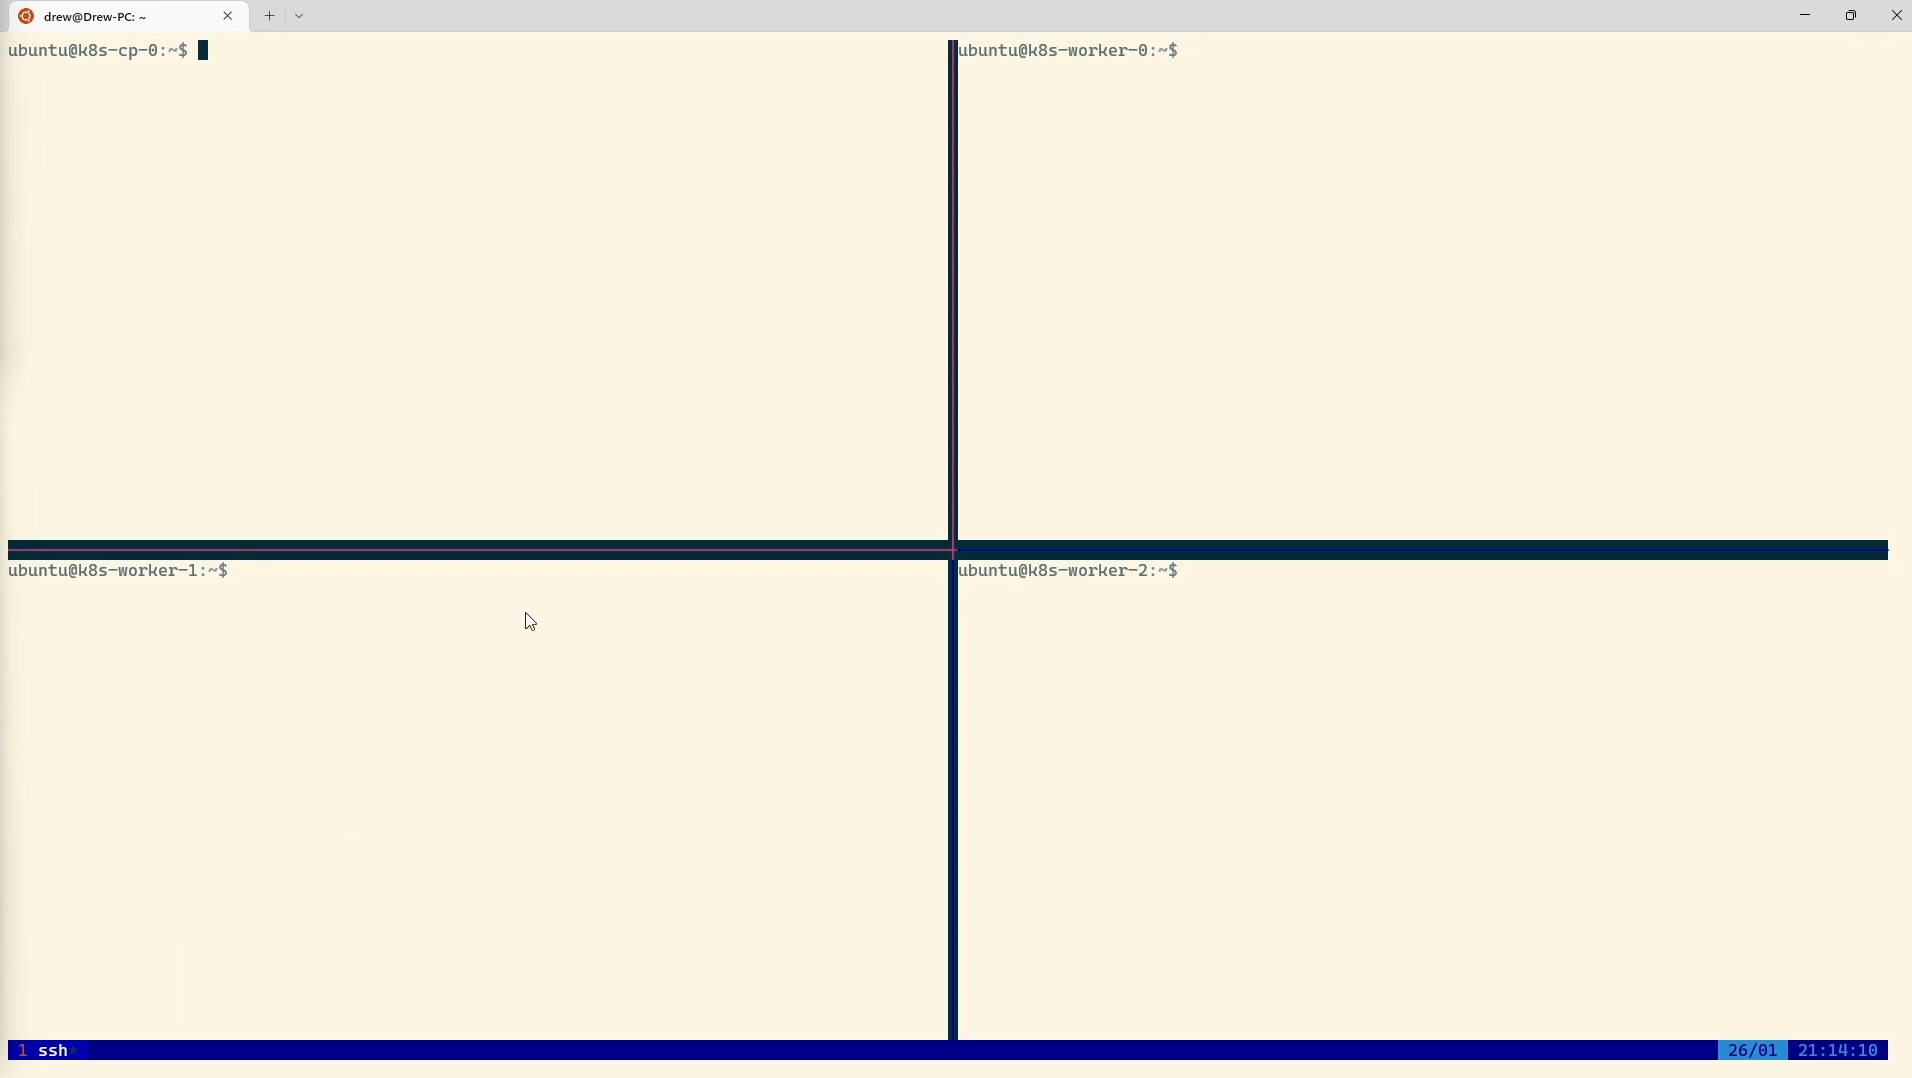
All the nodes are synchronized by panes, making it easier to execute commands across all four machines.
🔴 Follow this TMUX Tutorial: Link to TMUX tutorial
🔹 Alternative Tools: TMUX is powerful, but it has a learning curve. If you’re new to terminal multiplexing, you might prefer:
GNU Screen (Simpler, built-in on many systems)
Byobu (User-friendly wrapper around TMUX & Screen)
🧭 TMUX Navigation Tips:
Split panes vertically → Ctrl + B, then % Split panes horizontally → Ctrl + B, then “ Detach from a session → Ctrl + B, then D Reattach to a session → Run tmux attach
Now that we’re set up, let's move on to configuring KubeADM !!
3.Looking at KubeADM doc
Before proceeding, make sure your system meets all the necessary requirements by checking out the official Kubeadm installation guide:

Going through these steps will help us efficiently install all required dependencies. Let's get started!
SCENE 2: Installing a Container Runtime (ContainerD)
One thing that's gonna be common in every tutorial and installations is pre-requisites, which will appear again and again and again specially when we're setting up Kubernetes cluster. So bare with me coz I'm dropping another pre-req but it's important to look out for any.
Step 1: Install and Configure Prerequisites for containerD
Before we install Kubernetes, we need to configure our system properly.
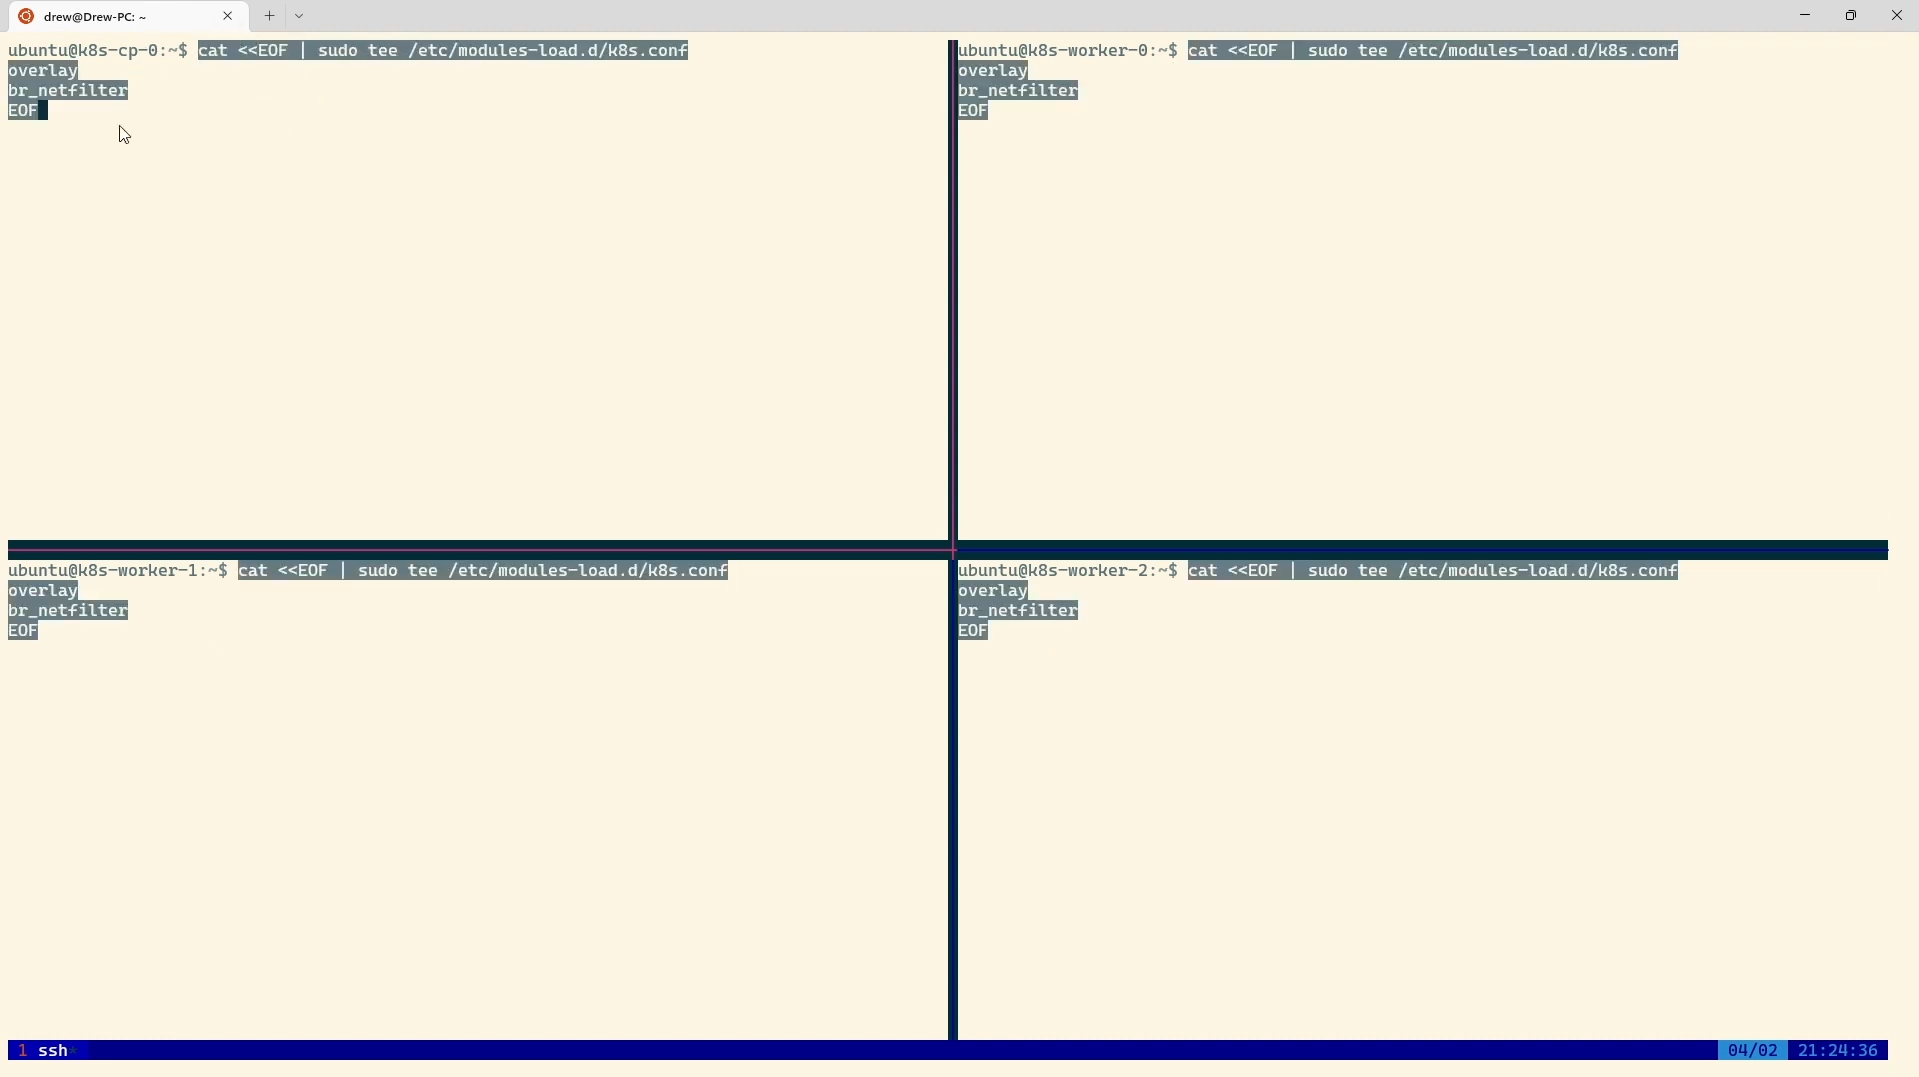
Enable IPv4 Packet Forwarding
Kubernetes requires packet forwarding to allow network traffic between pods across different nodes. Without it, pods on one node won't be able to communicate with pods on another node.
Run the following command to enable IPv4 forwarding:
# sysctl params required by setup, params persist across reboots
cat <<EOF | sudo tee /etc/sysctl.d/k8s.conf
net.ipv4.ip_forward = 1
EOF
🔴 Paste it into your terminal:
Now, apply the changes without rebooting:
# Apply sysctl params without reboot
sudo sysctl --system
To verify if IPv4 forwarding is enabled, run:
sysctl net.ipv4.ip_forward
It should return 1, indicating that forwarding is active.
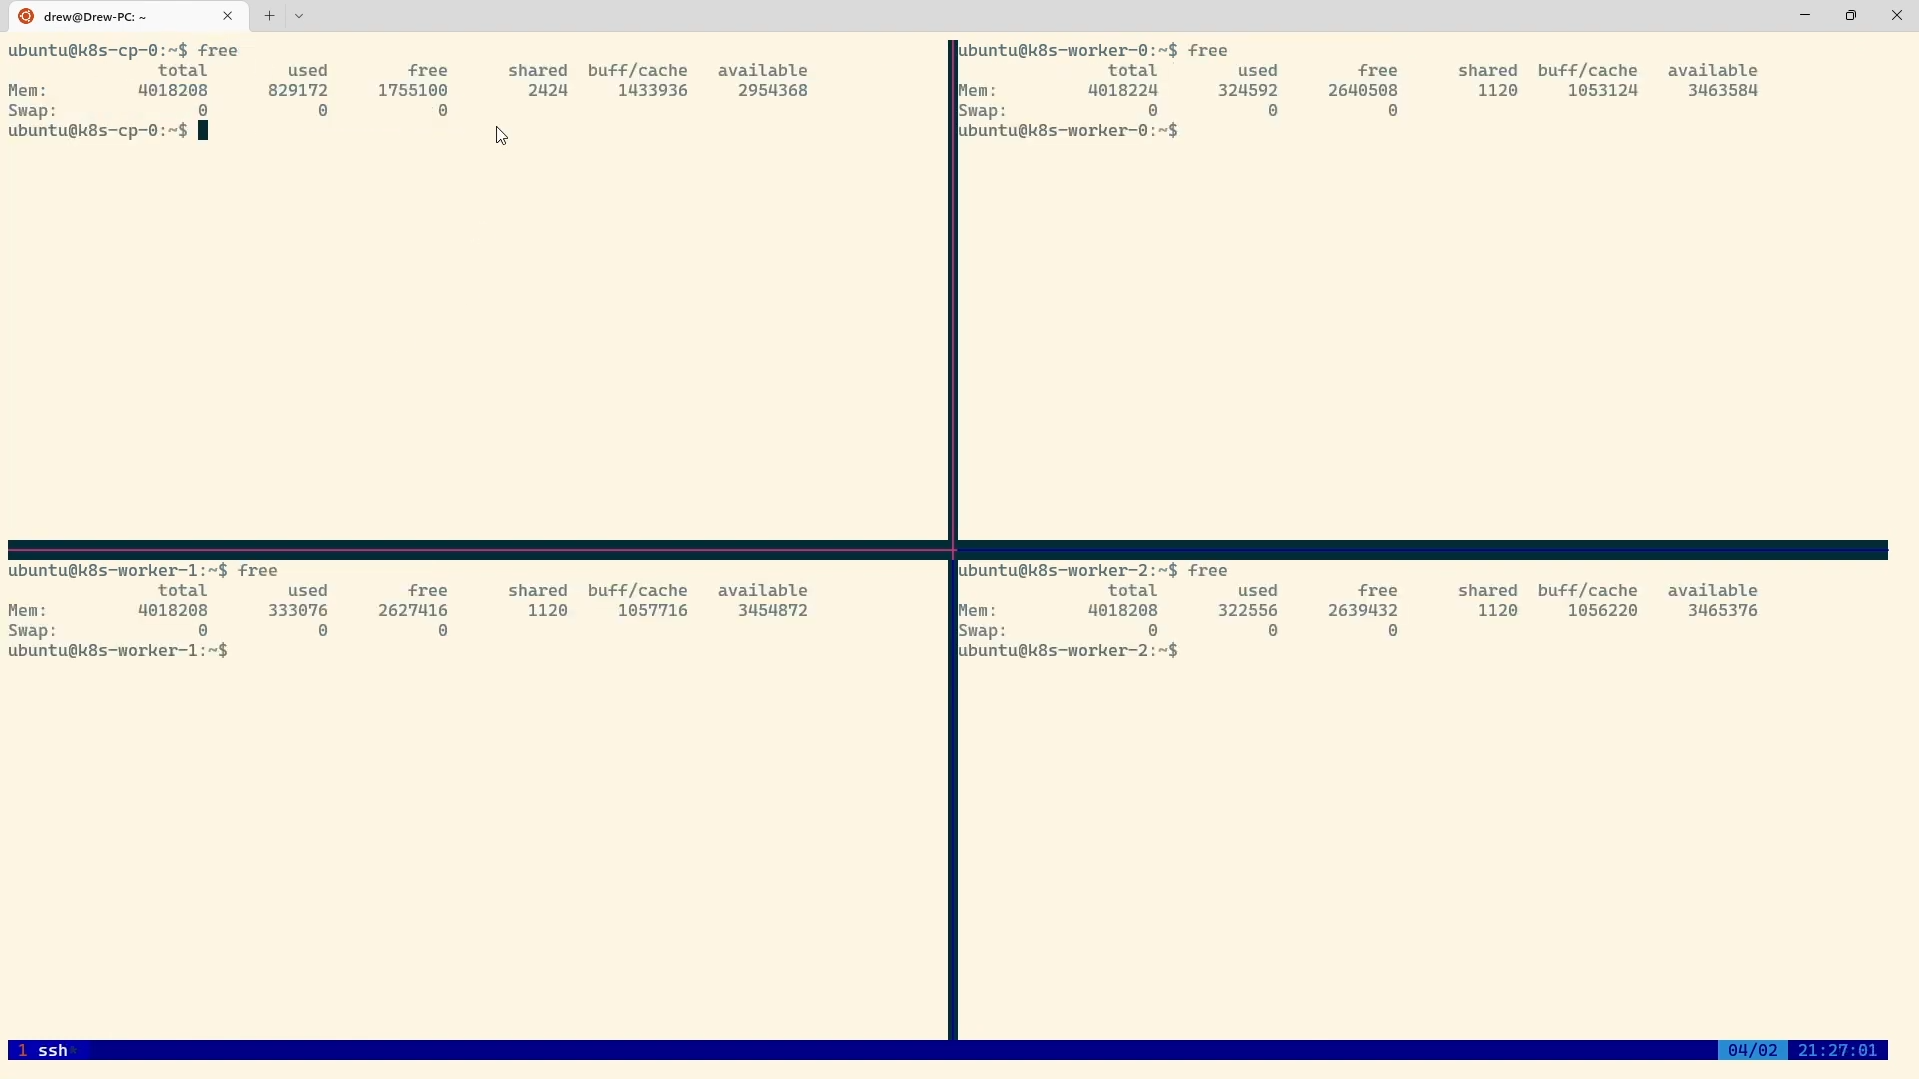
Disable Swap (Why It's Necessary)
Kubernetes requires swap to be disabled because the Kubernetes scheduler relies on precise memory allocation. If swap is enabled, the system may overcommit memory, causing pods to crash unexpectedly.
To disable swap, open the fstab file:
sudo vim /etc/fstab
Find the line containing /swap.img and comment it out by adding # at the beginning:
(in shell)
#/swap.img
Then, run:
sudo swapoff -a
To confirm that swap is disabled, check the memory usage:
free -h
You should see 0 in the swap column:
Now, your system is ready for Kubeadm! 🍭 Skipping these steps may cause Kubeadm setup failures, so make sure they are properly configured.
Step 2: Install ContainerD
I am bad at pointing out locations in real life—LOL. But I’ll try my best to guide you through this documentation step-by-step. Kindly bear with me, and don’t come for me in the comments! 😂
Where to Go
- Head over to: ContainerD Documentation
- Check out: Getting Started with ContainerD (GitHub Repo)
- Find the Latest Release: ContainerD Releases
- Scroll down to find the Assets section.
- Choose the right binary for your machine.
- DO NOT double-click! Instead, copy the link address of the release—we’ll use it in the terminal.
Phew! 😮💨 Now, let's get into it.
Download & Extract ContainerD
1. Set Version & Detect Architecture (Recommended)
Using environment variables makes future updates easier. Run the following commands:
export CONTAINERD_VERSION=$(curl -s https://api.github.com/repos/containerd/containerd/releases/latest | grep -oP '"tag_name": "v\K[^"]+')
export ARCH=$(uname -m)
if [ "$ARCH" == "x86_64" ]; then ARCH="amd64"; fi
2. Download ContainerD
wget https://github.com/containerd/containerd/releases/download/v$CONTAINERD_VERSION/containerd-$CONTAINERD_VERSION-linux-$ARCH.tar.gz
3. Extract to /usr/local
sudo su  # Switch to root user (optional)
tar Cxzvf /usr/local containerd-$CONTAINERD_VERSION-linux-$ARCH.tar.gz
Common FAQ 🧐
Enable ContainerD as a Systemd Service
If you plan to start ContainerD via systemd, download the service unit file and enable it:
Download the service file:
wget https://raw.githubusercontent.com/containerd/containerd/main/containerd.service -O /usr/lib/systemd/system/containerd.serviceReload systemd & enable the service:
systemctl daemon-reload
systemctl enable --now containerd
Check ContainerD status:
systemctl status containerd
If everything is running fine, you’re all set! 🚀
Using version variables & architecture detection ensures users download the correct binary and keeps this guide easy to update. Hope this helps! 💡
Step 3: Install runc
What is runc and Why is it Needed?
runc is a lightweight command-line tool used to spawn and run containers on Linux systems according to the Open Container Initiative (OCI) specification. It is the underlying runtime that most container engines, like Docker and containerd, rely on to execute containers.
Why is runc Needed?
- Low-level container runtime:
runcsets up the container’s environment, including namespaces and cgroups, and starts the process inside the container. - Standardized and OCI-Compliant: It follows the OCI runtime spec, making it compatible across different container orchestration systems.
- Used by Higher-Level Container Runtimes: Tools like containerd and CRI-O use
runcto actually start and manage container processes. - Security & Isolation: It ensures proper container isolation using Linux security features.
How containerd Uses runc
containerddoes not run containers directly; instead, it delegates container execution torunc.runchandles the low-level execution, while containerd focuses on container lifecycle management.
If containerd is the brain, runc is the hands that actually do the work of running containers. 🚀
Install runc
Download the right version (for my machine, it's
runc.amd64):- Copy the link address and run:
wget https://github.com/opencontainers/runc/releases/download/v1.2.6/runc.amd64
- Copy the link address and run:
Install runc:
install -m 755 runc.amd64 /usr/local/sbin/runcVerify Installation:
- Run
runcto check if it's installed:
runc
- Run
Step 4: Install CNI Plugin
Why Do We Need CNI Plugins?
The Container Network Interface (CNI) plugin is required to enable networking for containers. It ensures that containers can communicate with each other and with external networks.
Create a directory for CNI plugins:
mkdir -p /opt/cni/binDownload the CNI plugin:
- Head over to Getting Started with containerd > Step 3 Install CNI Plugin
- Go to Releases and choose the right plugin.
- For Linux (amd64), run:
wget https://github.com/containernetworking/plugins/releases/download/v1.6.2/cni-plugins-linux-amd64-v1.6.2.tgz
- Head over to Getting Started with containerd > Step 3 Install CNI Plugin
Extract and Install CNI Plugins:
tar Cxzvf /opt/cni/bin cni-plugins-linux-amd64-v1.6.2.tgz
Ensure everything is updated to the latest version.
Step 5: Exploring config.toml in ContainerD
What is config.toml?
The config.toml file is ContainerD’s main configuration file. It controls networking, container isolation, storage, logging, and security settings.
Generate & Edit config.toml
🍭 Create the directory (if not exists):
mkdir -p /etc/containerd
🍭 Generate the default config:
containerd config default > /etc/containerd/config.toml
🍭 Open the file to edit:
vim /etc/containerd/config.toml
If you see TOML configurations, you’re in the right place! Exit the file (:q!) and proceed to Step 6. 🚀
Step 6: Configuring the systemd cgroup driver
To use the systemd cgroup driver in /etc/containerd/config.toml with runc, head over to the config.toml file.
Open the config file:
vim /etc/containerd/config.tomlLocate the following section:
[plugins."io.containerd.grpc.v1.cri".containerd.runtimes.runc]Inside this section, find:
[plugins."io.containerd.grpc.v1.cri".containerd.runtimes.runc.options]Modify the
SystemdCgroupsetting:
Change:SystemdCgroup = falseto:
SystemdCgroup = true
💡 Why is this important?
– The kubelet and containerd must use the same cgroup driver for stability.
– systemd is the default on most Linux distros and integrates better with cgroup v2.
Check for cgroup v2 Support
Run:
stat -fc %T /sys/fs/cgroup
If the output is cgroup2fs, then cgroup v2 is enabled.
💡 Why prefer cgroup v2?
– Simplifies resource management.
– Avoids inconsistencies seen in cgroup v1.
– Recommended by Kubernetes for better stability.
Restart & Verify ContainerD
Restart containerd:
systemctl restart containerdCheck the status:
systemctl status containerdIf everything is active ✅, congrats! 🎉 Your setup is good to go!
SCENE 3: Install Kubeadm, Kubelet, and Kubectl
We've warmed up—now it's time for the real workout! But don't worry, it's pretty straightforward. (At least, I hope so! 😆)
Step 1: Update apt and Install Dependencies
First, let's update the package list to ensure we're working with the latest versions:
apt-get update
Now, install the necessary dependencies:
# apt-transport-https may be a dummy package; if so, you can skip that package
apt-get install -y apt-transport-https ca-certificates curl gpg
📝 Why these packages?
– apt-transport-https → Allows APT to fetch packages over HTTPS (secure connections).
– ca-certificates → Ensures system trusts SSL certificates.
– curl → Fetches files from the internet.
– gpg → Verifies package signatures for security.
Step 2: Download the Google Cloud Public Signing Key
Run the following command to add Google's public signing key:
# If the directory `/etc/apt/keyrings` does not exist, it should be created before the curl command, read the note below.
# sudo mkdir -p -m 755 /etc/apt/keyrings
curl -fsSL https://pkgs.k8s.io/core:/stable:/v1.32/deb/Release.key | sudo gpg --dearmor -o /etc/apt/keyrings/kubernetes-apt-keyring.gpg
Step 3: Add the Kubernetes APT Repository
Run the following command to add the Kubernetes repository:
# This overwrites any existing configuration in /etc/apt/sources.list.d/kubernetes.list
echo 'deb [signed-by=/etc/apt/keyrings/kubernetes-apt-keyring.gpg] https://pkgs.k8s.io/core:/stable:/v1.32/deb/ /' | sudo tee /etc/apt/sources.list.d/kubernetes.list
Along with following this tutorial, I would highly suggest opening up the official documentation alongside to get the right version at all times.
📝 Step 3: Install Tools and Pin Versions
🔹 Why is pinning important?
If you don’t pin versions, an upgrade to a newer Kubernetes version might happen during a system update, which can break compatibility in a multi-node setup. AND THIS IS BAD AND SAD AND AWFUL FOR CYBERSECURITY—DO NOT DO IT OR I WILL BE DISAPPOINTED. 😤 But fear not, this is what Dependabot was made for! Look into it—even though it’s not totally secure either, but at least it’s a start.
🔹 Quick Definitions:
– kubelet → The agent that manages containers on each node.
– kubeadm → Initializes the cluster.
– kubectl → The CLI you use to interact with the cluster.
Step 4: Update the apt Package Index, Install Kubernetes Components, and Pin Their Versions
Run the following commands to install kubelet, kubeadm, and kubectl:
apt-get update
apt-get install -y kubelet kubeadm kubectl
apt-mark hold kubelet kubeadm kubectl
📝 Component Responsibilities:
– Kubelet → Ensures that containers are running in a node.
– Kubeadm → Responsible for initializing a Kubernetes cluster.
– Kubectl → CLI tool for interacting with the Kubernetes API.
Next up: Verifying installation and configuring your cluster! 🚀
SCENE 4: Creating a Cluster
Initializing Your Control Plane Mode
We want to set up a Highly Available (HA) control plane and add worker nodes. To achieve this, we need to define a --control-plane-endpoint. If we were in the cloud, we could use a load balancer's IP. But we are setting up on our machines, so we need an alternative.
Enter KubeVIP! ✨
KubeVIP allows us to use a virtual IP address (VIP) for the control plane without requiring an external cloud-based load balancer.
Step 1: Preparing for HA Control Plane with KubeVIP
🔹 Why HA Matters? – The control plane schedules workloads and manages cluster state. – In an HA setup, multiple control planes prevent downtime in case one fails.
Follow the KubeVIP documentation to get started.
📝 If you're NOT worried about HA (which you should be), you can skip this. But be warned: without HA, you'll need to configure external load balancers later!
Step 2: Generating a KubeVIP Manifest
First, find a free IP in your network:
ip a
Set a VIP address (ensure it doesn't conflict with existing IPs):
export VIP=xxx.xxx.x.xxx
Set the interface name where KubeVIP will announce the VIP:
export INTERFACE=interface_name
Install jq to parse the latest KubeVIP release:
apt install jq -y
Fetch the latest version:
KVVERSION=$(curl -sL https://api.github.com/repos/kube-vip/kube-vip/releases | jq -r ".[0].name")
Note: KubeVIP setup only applies to the control plane node, not worker nodes.
Step 3: Creating the KubeVIP Manifest
For containerd, run:
alias kube-vip="ctr image pull ghcr.io/kube-vip/kube-vip:$KVVERSION; ctr run --rm --net-host ghcr.io/kube-vip/kube-vip:$KVVERSION vip /kube-vip"
Ensure the manifest directory exists:
mkdir -p /etc/kubernetes/manifests
Generate the manifest:
kube-vip manifest pod \
    --interface $INTERFACE \
    --address $VIP \
    --controlplane \
    --services \
    --arp \
    --leaderElection | tee /etc/kubernetes/manifests/kube-vip.yaml
Step 4: Initializing the Control Plane
Run:
kubeadm init --control-plane-endpoint $VIP
🔹 Breaking Down kubeadm init Flags:
– --control-plane-endpoint → Defines the shared endpoint for all control planes.
– --pod-network-cidr → Defines the pod network range (must match CNI plugin requirements).
Step 5: Setting Up kubeconfig
🔹 What is kubeconfig?
This file stores credentials and cluster info so kubectl can securely communicate with the cluster.
mkdir -p $HOME/.kube
cp -i /etc/kubernetes/admin.conf $HOME/.kube/config
chown $(id -u):$(id -g) $HOME/.kube/config
🔴 Next: Adding Worker Nodes and Deploying a Pod Network!
Kubernetes Cluster Setup with Calico Networking
Step 1: Choose a Pod Network Add-on
A Pod Network Add-on enables communication between pods in your cluster. We are using Calico, a widely adopted choice due to its scalability and support for network policies.
Some network providers require you to pass specific flags to kubeadm init. For Calico, you must set --pod-network-cidr appropriately.
Download the Calico Networking Manifest
Run the following command to download the Calico manifest:
curl -O https://raw.githubusercontent.com/projectcalico/calico/v3.29.2/manifests/calico.yaml
Step 2: Understanding Pod CIDR
CIDR (Classless Inter-Domain Routing) assigns IP addresses in a structured manner. Each pod in your cluster requires a unique IP from the CIDR block. This ensures that pods can communicate across nodes within the cluster.
Step 3: Initialize the Kubernetes Cluster
To initialize your cluster, use the kubeadm init command. Set the --pod-network-cidr to match Calico's expected value:
kubeadm init --pod-network-cidr=192.168.0.0/16 --control-plane-endpoint=192.168.0.200 --apiserver-advertise-address=192.168.0.201
Note:
The control-plane-endpoint should ideally be a DNS name or a static IP that won’t change. If the IP changes later, the cluster may become inaccessible due to certificate mismatches.
Once the initialization is complete, configure your kubeconfig:
export KUBECONFIG=/etc/kubernetes/admin.conf
Step 4: Set Up a DNS Record
To ensure smooth communication within the cluster, add a DNS record in /etc/hosts:
vim /etc/hosts
Add the following entry:
192.168.0.200 kube-api-server
Test the connection:
apt install iputils-ping
ping kube-api-server
Step 5: Deploy Calico Networking
Apply the Calico manifest to configure networking:
kubectl apply -f calico.yaml
Verify installation:
kubectl get -f calico.yaml
kubectl get po -n kube-system
If all pods are running successfully, your network setup is complete.
Step 6: Add Worker Nodes to the Cluster
To join worker nodes, first retrieve the join command from the control plane:
kubeadm token create --print-join-command
Run the command outputted on each worker node:
kubeadm join 192.168.0.200:6443 --token <your-token> \
    --discovery-token-ca-cert-hash sha256:<your-ca-cert-hash>
Important Notes:
kubeadmtokens expire after 24 hours. If the token expires, usekubeadm token create --print-join-commandto generate a new one.- The
ca-cert-hashandtokenvalues are unique to your cluster. Do not reuse sample values from tutorials.
Once the nodes have joined, verify the cluster status:
kubectl get nodes -o wide
Troubleshooting
Common Issues:
Node Not Ready:
kubectl get nodes
journalctl -xeu kubelet
Check the logs for errors and ensure that
kubeletis running properly.Pod Stuck in Pending State:
kubectl describe pod <pod-name> -n kube-system
kubectl logs <pod-name> -n kube-system
Look for networking issues or missing node components.
Control Plane Inaccessible:
- Ensure the
control-plane-endpointis resolvable. - Check that the API server is running:
kubectl cluster-info.
- Ensure the
Security Considerations
- Do not expose the Kubernetes API server to the internet without proper authentication and firewall rules.
- Use RBAC (Role-Based Access Control) to limit access to cluster resources.
- Implement TLS encryption for secure communication between components.
- Regularly update your cluster and monitor for security vulnerabilities.
Next Steps
Now that your cluster is up and running, here are some recommended next steps:
- Deploy a sample application:
kubectl create deployment nginx --image=nginx kubectl expose deployment nginx --type=NodePort --port=80 - Install Kubernetes Dashboard to monitor your cluster visually.
- Explore Kubernetes Concepts like Deployments, Services, and RBAC.
🚀 Congratulations! Your Kubernetes cluster with Calico networking is ready for use!